Outbuildings, Solved: How to Get Real WiFi to a Detached Garage, Shed, or Backyard Office
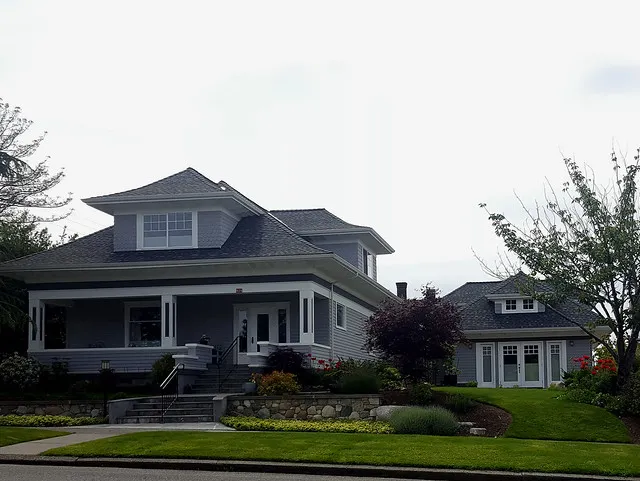
Photo: Sightline Institute: Missing Middle Homes Photo Library, CC BY 2.0, via Wikimedia Commons
There's a moment every backyard-office project hits: the laptop connects, the video call starts, and the whole thing collapses the instant someone closes the garage door. The indoor extender you bought is sitting in the kitchen, radiating bravely through two exterior walls, a stucco facade, and forty feet of damp November air.
Extending WiFi to an outbuilding is a different sport from fixing a dead bedroom. The distances are longer, the walls are worse, and the gear has to survive weather. Here's how to pick correctly the first time.
Do the Distance and Loss Math First
Every wall costs you. A typical interior drywall partition takes a couple of dB. An exterior wall with insulation, sheathing, and stucco or brick can eat 10–20 dB or more. Add distance, and a signal that reads a healthy −55 dBm at your back door might be −80 dBm at the shed — which is functionally unusable for anything real-time.
Rough planning numbers for a house-to-outbuilding link:
- Under 30 feet, clear line of sight: a decent mesh node near the exterior wall can sometimes work.
- 30–75 feet with a wall or two in the way: you're in bridge or outdoor access point territory.
- Over 75 feet, or any metal siding involved: run cable, or plan on directional gear.
Metal is the wild card. A steel-sided garage or a shed with a metal roof is essentially a Faraday cage. No indoor extender placed indoors is fixing that.
What an Indoor Extender Can't Do
Indoor extenders are rated for indoor climate and indoor distances. Put one in an unheated garage in a Minnesota January and you'll get condensation, thermal shutdown, or a slow death. They're also omnidirectional, which means most of their output goes somewhere useless — into your yard, your neighbor's yard, and the dirt.
Use an indoor extender for the room closest to the outbuilding, then hand off to something purpose-built.
Your Four Realistic Options
1. Outdoor-rated access point, wired back to the router. The gold standard. You run Ethernet (or use an existing run) to a weatherproof AP mounted on the exterior of the house or the outbuilding. Speeds are full-rate, latency is low, and it's boring in the best way. Budget $100–$250 for the AP, plus cable.
2. Point-to-point wireless bridge. Two directional units, one aimed at the other, forming a dedicated link. Excellent for 100–500 feet with line of sight. Modern 5 GHz or 60 GHz bridges can push hundreds of megabits. You'll need clear aim and usually a mounting bracket; expect $150–$400 for a pair.
3. Powerline. Works only if the outbuilding shares a transformer and, ideally, the same panel. A detached garage on its own subpanel fed from the house is sometimes fine; a shed on a separate meter is a lost cause. Distance, GFCI protection, and AFCI breakers all degrade powerline performance. Test before you commit.
4. MoCA over coax. Beautiful if the outbuilding already has coax from an old satellite install. Adapters are cheap and the link behaves like wired Ethernet. Check that the run is actually connected end to end before buying.
Where the Weather Gets You
If gear lives outside, the rating matters. Look for an IP65 or better enclosure, and note the operating temperature range — plenty of "outdoor" units are only rated down to −4°F or up to 140°F. In practice you want the electronics under an eave or in a ventilated box, not baking in direct summer sun.
Small details that cause most failures:
- Drip loops. Every cable entering an enclosure should sag below the entry point so water runs off instead of in.
- Dielectric grease on outdoor connectors, plus proper weatherproof boots.
- UV-rated cable. Regular indoor Ethernet jacket cracks within two summers.
- Surge protection on the Ethernet run. A nearby lightning strike induces voltage on long cables; a $30 inline protector is cheap insurance.
- Grounding. Outdoor APs with metal housings want a real ground. If you're not comfortable with that, hire it out.
The Decision Tree
Run through these in order:
- Is there already a cable path? Conduit, coax, or an old phone line you could pull through? Use it.
- Is the outbuilding within about 100 feet with line of sight? Go point-to-point bridge.
- Is it 30–60 feet with a wall or two? Mount an outdoor AP on the house facing the building, or a mesh node in a weatherproof enclosure near the exterior wall.
- Do you need low latency, multiple devices, or 4K video calls? Stop optimizing wireless and price out a trench. Direct-burial Cat6 or fiber in conduit is a weekend project and a permanent fix. In most of the US, trenching 60 feet costs $300–$900 depending on whether you dig or pay someone.
- Is the building on the same electrical service? Try powerline only as a test, with a return-friendly retailer.
A Note on Permits and HOAs
Before you mount anything on an exterior wall, check whether your HOA has opinions about visible equipment. Most do. A pole-mounted bridge tucked behind a fence line is usually the path of least resistance, and it's easier to aim than something bolted to the house anyway.
The Honest Bottom Line
If it's a shed you check on twice a week, a decent bridge pair is plenty. If someone is going to work out there forty hours a week, running cable is the only answer that stops being a project and starts being infrastructure. Buy once, aim carefully, and remember that a $200 directional link will beat a $60 indoor extender every single time — even if the extender has three antennas and a very confident box.